• Bees are essential for pollination and plant growth.
  • Crafting bee-themed projects can reinforce learning and creativity.
  • Understanding the lifecycle of bees is important for science education.
  • Teaching children about environmental stewardship through bee-related activities is valuable.

Bees are not just fascinating insects; they're also vital to our ecosystem. Bringing the buzz about bees into the preschool classroom can create a hive of activity that's both educational and fun. Let's explore some innovative bee-themed preschool crafts and lessons that will have your little ones buzzing with excitement and curiosity about these essential pollinators.

The Buzz on Bees: Understanding Our Fuzzy Friends

Before diving into the crafts, it's important to lay a foundation of knowledge. Bees play a crucial role in pollination, which helps plants grow, breed, and produce food. They do so by transferring pollen between flowering plants and so keep the cycle of life turning. The humble bee is as important to the environment as it is to our understanding of it. A great way to introduce bees is through an engaging storytime session, where you can narrate tales that highlight their role in nature.

After storytime, encourage questions from your preschoolers about bees and their habitat. This discussion can lead into an interactive sing-along session featuring songs about bees. Music is not just a way to entertain; it’s an effective educational tool that enhances memory and learning.

Bee Creative: Pollinator Crafts for Little Hands

Crafting is a wonderful way to reinforce learning through hands-on activities. Start with something simple like creating bee finger puppets. These are not only fun to make but also provide props for imaginative play later on. Using basic materials like construction paper, glue, and markers, each child can personalize their bee puppet.

Bee Puppet Guide

  1. bee craft materials
    Gather Materials - Collect yellow and black construction paper, safety scissors, glue, and a marker.
  2. cutting paper strips for crafts
    Cut Paper Strips - Cut yellow paper into strips for the bee's body and small black strips for the stripes.
  3. making paper cylinder for finger puppet
    Form the Body - Wrap a yellow strip around your child's finger to measure and glue the ends to create a cylinder.
  4. gluing stripes on bee puppet
    Add Stripes - Glue black paper strips around the yellow body to resemble bee stripes.
  5. bee wings paper craft
    Create Wings - Cut out wing shapes from white paper and attach them to the back of the bee's body.
  6. drawing face on bee puppet
    Draw the Face - Use the marker to draw eyes and a smile on the bee's face.
  7. bee antennae craft
    Add Antennae - Cut two small strips of black paper and glue them to the top of the bee's head for antennae.
  8. decorating bee finger puppet
    Bee Creative - Encourage your child to add their own creative touches, like glitter or stickers!

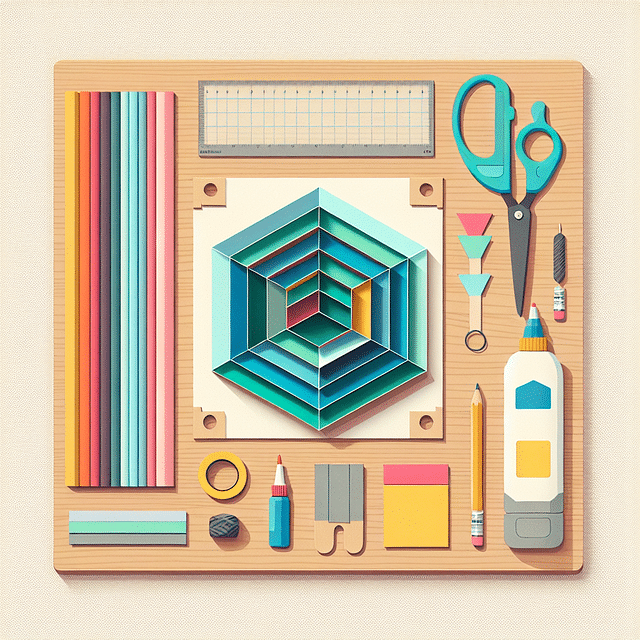
For those looking for a bit more of a challenge, constructing a 3D honeycomb from hexagon-shaped cutouts can be an excellent group project. This activity not only teaches kids about the unique structure of bee homes but also involves geometry and teamwork.

Buzzworthy Crafts: Crafting a 3D Paper Honeycomb

craft materials for making a paper honeycomb arranged on a table
Gather Your Materials
Start your buzzing craft adventure by collecting all the necessary materials. You'll need yellow, black, and white construction paper, scissors, glue, a pencil, and a ruler. Make sure you have a clean workspace ready to bring your honeycomb to life!
yellow hexagons cut out of construction paper
Cut the Honeycomb Cells
Using the yellow construction paper, cut out multiple hexagons to create the cells of your honeycomb. Each hexagon should be of the same size. A good size to aim for is about 3 inches in diameter, but feel free to adjust based on your preference!
folded paper hexagons being glued together to form a 3D honeycomb
Create the 3D Effect
Fold each hexagon in half, creasing them sharply down the middle. Then, apply glue to one half of the hexagon and stick it to another hexagon half, aligning the edges carefully. Continue this process, adding hexagons around in a circle until you have a full honeycomb shape.
paper bees with white wings being added to a paper honeycomb
Add the Bees
Now, let's buzz up the excitement! Cut out small oval shapes from the black construction paper for the bees' bodies. Then, use the white paper to create delicate wings. Glue the wings onto the bodies, and then add these adorable bees to your honeycomb with a dab of glue on each one.
finished 3D paper honeycomb with bees and decorative background
Final Touches
With your bees in place, it's time to add some final touches. Draw small eyes and stripes on the bees with a black marker. You can also create a background by gluing your honeycomb onto a larger piece of construction paper. Perhaps a bright blue to represent the sky, or a lovely floral pattern to mimic a garden!

The Lifecycle of a Bee: From Egg to Adult

A critical part of understanding bees is learning about their lifecycle. From egg to larva, pupa to adult bee, each stage can be illustrated through creative activities. One idea is to create a bee lifecycle spinner, where kids can visually follow the transformation as they spin through each phase.

Buzzing with Fun: Creating a Bee-Themed Sensory Board

a collection of craft materials for a bee-themed project
Gathering Your Buzzworthy Materials
Start your adventure by collecting all the necessary materials for your bee-themed sensory board. You'll need a large foam board or sturdy cardboard, yellow and black felt, various textured materials like bubble wrap and sandpaper, glue, scissors, Velcro strips, and bee decorations like stickers or printed images.
alternating yellow and black felt stripes on a board
Preparing the Bee's Background
Lay your foam board on a flat surface. Cut the yellow and black felt into large stripes to mimic a bee's pattern. Arrange them on the board in alternating colors and glue them down. This will serve as the buzzing background for your sensory board.
textured materials on a bee-themed sensory board
Adding a Variety of Textures
Now, let's give little fingers exciting textures to explore! Cut out shapes from different textured materials—think bubble wrap, sandpaper, and soft fabric. Attach these with glue or Velcro to create a tactile experience. Arrange them in a way that invites touch and discovery.
handmade bees on a sensory board
Creating the Buzzing Bees
It's time to bring the bees to life! Use bee decorations or cut out bee shapes from construction paper. Add details like wings and stripes with markers or more felt. Then, attach these bees to the board with Velcro, so preschoolers can move them around the board.
educational elements on a bee-themed sensory board
Incorporating Learning Elements
Enhance your board with educational elements. Include numbers on the bees or flowers to introduce counting. Add letters to start phonics learning. You can also create simple puzzles or matching games with shapes on the board to promote problem-solving skills.
completed bee-themed sensory board with a neat border
Finishing Touches
Give your sensory board a polished look by trimming any excess material and securing loose ends. You can also add a border with washi tape or more felt. Make sure all elements are securely attached to ensure safety during play.

Incorporating DIY arts and crafts activities into your lesson plan not only supports cognitive development but also fine motor skills. As children cut out shapes, glue parts together, or color their creations, they're improving hand-eye coordination while learning valuable lessons about nature's little workers.

Bee-ing Mindful: Environmental Lessons Through Play

Beyond crafts and songs, there's an opportunity to teach young children about environmental stewardship by discussing how we can protect bees in our own backyards. Setting up a "Save the Bees" campaign poster-making session allows kids to express what they've learned creatively while advocating for these important creatures.

Eco-Friendly Natural Glue

You will need:

  • cornstarch in a bowlCornstarch
  • water in measuring cupWater
  • white vinegar bottleWhite vinegar
  • small saucepanSmall saucepan
  • spoon for stirringSpoon
  • measuring cups and spoonsMeasuring cups and spoons
  • empty jar with lidJar with lid for storage

Instructions

  1. Start by combining 3 tablespoons of cornstarch with 4 tablespoons of cold water in a small bowl.
  2. Stir the mixture until the cornstarch is completely dissolved.
  3. Pour the cornstarch mixture into a small saucepan.
  4. Add 2 cups of water and 1 teaspoon of white vinegar to the saucepan.
  5. Stir the mixture over medium heat until it thickens and becomes translucent.
  6. Remove the saucepan from the heat and allow the glue to cool.
  7. Transfer the glue to a jar with a lid for storage.

Notes

This homemade glue is perfect for paper crafts and other light materials. It's not waterproof and works best on porous surfaces. For a thicker consistency, you can add more cornstarch in small increments, but be sure to cook it thoroughly. Always label the jar with the date it was made, as homemade glue has a shorter shelf life than commercial glues. Store the glue in a cool, dry place and use within 1-2 weeks for best results.

To further enrich this lesson, consider planting some flowers known for attracting bees in your school garden or in containers if space is limited. Engage your preschoolers in this process by letting them help with planting seeds or watering plants—this hands-on experience not only connects them directly with nature but also instills responsibility and care for living things.

  1. Spring Crafts for Preschoolers
  2. Fun and Engaging Crafts for Preschoolers
  3. Fun and Easy Crafts for Preschoolers
  4. Fun Arts and Crafts for Preschoolers
  5. Creative Preschool Bulletin Board Ideas
  6. Festive Preschool Christmas Crafts
  7. Spring Crafts Quiz for Preschoolers
  8. Valentine’s Day Craft Quiz for Preschoolers
  9. Festive Christmas Crafts Quiz for Preschoolers

Incorporate these ideas into your classroom routine, and you'll see just how much fun learning about bees can be! Stay tuned as we continue exploring more ways to create a buzz with innovative bee-themed activities in our next segment!

Bee-autiful Art: Honeycomb Collage

Let's dive into an art project that combines sensory play with creativity, resulting in a honeycomb collage. This activity is perfect for developing fine motor skills and understanding textures. Start by cutting out hexagon shapes from construction paper or cardstock to represent honeycomb cells. Provide your little bees with a variety of materials such as tissue paper, buttons, and yarn. Encourage them to glue these onto their hexagons to create a tactile honeycomb masterpiece. Not only does this craft reinforce the shape associated with bees, but it also allows children to express themselves through different mediums.

The Buzz on Science: Bee Life Cycle Exploration

Understanding the life cycle of bees is not just fascinating; it's a cornerstone of early science education. With a bee life cycle exploration, preschoolers can learn about growth, change, and the environment. Use printable life cycle diagrams or create your own with the kids using craft supplies. For an interactive experience, you could even have children act out the stages of bee development with costumes or props—egg, larva, pupa, and finally, an adult bee!

Buzz-worthy Bee Life Cycle Chart

craft supplies for bee life cycle chart arranged on a table
Gather Your Materials
Start by buzzing around to collect all the necessary supplies. You'll need four sheets of paper (preferably cardstock for durability), markers or paint, a pair of scissors, glue, and images or drawings of the four stages of a bee's life cycle: egg, larva, pupa, and adult bee.
yellow painted sheet of paper for craft background
Prepare the Background
Take one large sheet of paper to serve as the background for your bee life cycle chart. Choose a sunny yellow to reflect the cheerful essence of bees, and paint or color the entire sheet. Let it dry if you're using paint.
drawings of bee life cycle stages cut into hexagonal shapes
Illustrate the Life Cycle Stages
On the remaining sheets of paper, draw or glue images representing each stage of the bee's life cycle. Label each one clearly with the stage name: egg, larva, pupa, and adult bee. Cut out these illustrations in a circular or hexagonal shape to mimic honeycombs.
bee life cycle stages arranged in a circle on yellow background
Arrange the Life Cycle
Place the life cycle stages on the yellow background in the correct order. Start with the egg stage at the top, followed by larva, pupa, and finally the adult bee. Arrange them in a circle to represent the cyclical nature of life. Glue them onto the background.
descriptions written under bee life cycle stages on a chart
Add Descriptions
Under each stage, write a brief description of what happens during that part of the bee's life. Keep it simple and engaging, using phrases like 'From tiny egg to busy bee!' Encourage the children to help with ideas for the descriptions.
decorated bee life cycle chart ready to be displayed in a classroom
Decorate and Display
Let your creativity fly! Decorate the chart with glitter, stickers, or drawings of flowers and honeycombs. Once complete, display the bee life cycle chart in the classroom where the children can see and refer to it during your bee-themed lessons.

Incorporating literature into your lesson plan can also enhance understanding. There are wonderful children's books that talk about bees and their importance in our ecosystem. Reading these stories can spark curiosity and empathy towards these little pollinators.

Sing Along: The Bee Dance Song

No preschool day is complete without music and dance! As I always say, if you want to make learning stick, put it in a song! The "Bee Dance Song" is a catchy tune that teaches kids about how bees communicate where flowers are through dance. It's an excellent way to get those wiggles out while learning about bee behavior. You can create simple choreography that mimics the waggle dance bees do—a fun way to integrate physical education into your theme!

To extend this musical journey at home, encourage parents to listen to these songs with their children. It's a delightful way for families to connect over what their little ones are learning in school.

Bee-ing Together: Community Pollination Project

Finally, let’s talk about bringing the community together through a pollination project. This could involve planting flowers known to attract bees or even setting up a small bee-friendly garden at your school. Not only does this teach children about how they can help bees in real-life situations, but it also instills values of environmental stewardship from an early age.

Which flowers should we plant in our bee-friendly school garden?

Help us choose the perfect blooms to support our buzzing friends and make our garden a bee paradise!

Connect this project with other classroom activities by creating artwork or signs for the garden space or keeping a journal documenting any visiting bees and other wildlife.

To wrap up our buzzing adventure into bee-themed crafts and lessons for preschoolers, remember that every activity should be rooted in fun and discovery. Whether you're piecing together a honeycomb collage or dancing like bees finding nectar, each moment is an opportunity for growth and joy.

If you're looking further enrich your classroom with creative ideas beyond our buzzing friends here today, check out our resources on DIY arts and crafts activities, spring crafts, or take one of our quizzes like Spring Crafts for Preschoolers Quiz to test your knowledge on seasonal activities!

And don't forget! For more themed craft ideas throughout the year—from Valentine's Day hearts to Christmas cheer—visit our pages on festive crafts and take quizzes such as the Valentine's Day Craft Quiz or Festive Preschool Christmas Crafts Quiz. These resources are surefire ways to keep creativity buzzing all year round!

Jack Thompson
Music Education, Song Writing, Preschool Teaching, Child Development

Jack Thompson is a children's song writer and preschool teacher. With a background in music education, Jack has a knack for creating catchy tunes that not only entertain but also educate. He loves to incorporate music into his teaching and believes that it can greatly enhance a child's learning experience.

Post a comment

0 comments